
Sometime, even the most sophisticated DSLRs can make a complete mess of the your exposure, with the result that your subjects will be too light or too dark. Think about some landscape photos you may have seen where the sky looks great but foreground objects are too dark, snow photos where the snow looks grey, or people playing on a beach in bright sunshine, but it looks like they were playing at tea time because the images were dark.
This happens because camera metering systems attempt to average out the exposure to give a mid grey tone, (not grey in colour!), this usually works well because many images have both bright and dark areas in the scene. When the tones of these areas are averaged out, they quite often end up as mid-grey, but when a scene has very prominent bright or very prominent dark areas, this averaging out method can cause under or over exposure.
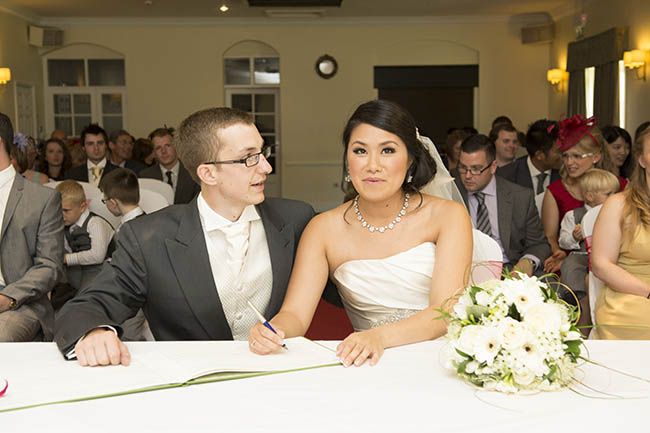
The lovely bride Aimee above, has beautiful light skin, but because the wall and her dress are quite dark toned (and her face and arms are quite small in the frame), her skin would have been over-exposed if I hadn't used -1.3ev exposure compensation.
In these two short video clips you'll see how the auto metering system of the video camera is fooled when zoomed in.
In both cases, the image changed to a mid grey, obviously you wouldn't normally fill the frame with all black or all white, but it does show how the exposure can be fooled by the tone of the subject. In fact the light didn't change on either the material or on the wall, so in theory the exposure should have remained the same.
Unless you're in Manual Exposure mode, the only way to lighten or darken an image is to use exposure compensation, there's absolutely no point in switching from say Aperture Priority to Shutter Speed priority or vice versa, it won't make any difference. Exposure compensation changes the shutter speed or the aperture by the amount of compensation you specify. The method of changing exposure compensation varies from one camera to the next,


Then you simply move the appropriate camera dial to move the pointer towards the + position to make the image lighter, or the - position to make the image darker. As a rule of thumb, to lighten up an image try around +1.0ev as a starting point, and the opposite to darken an image.
To see exposure compensation in action and how the camera settings change with different subjects, even in the same light, watch the Exposure Compensation video


Leave A Comment
You must be logged in to post a comment.