About Bernie

This author has not yet filled in any details.
So far Bernie has created 27 blog entries.

The Golden Hour in Photography

2017-05-29T16:22:15+01:00

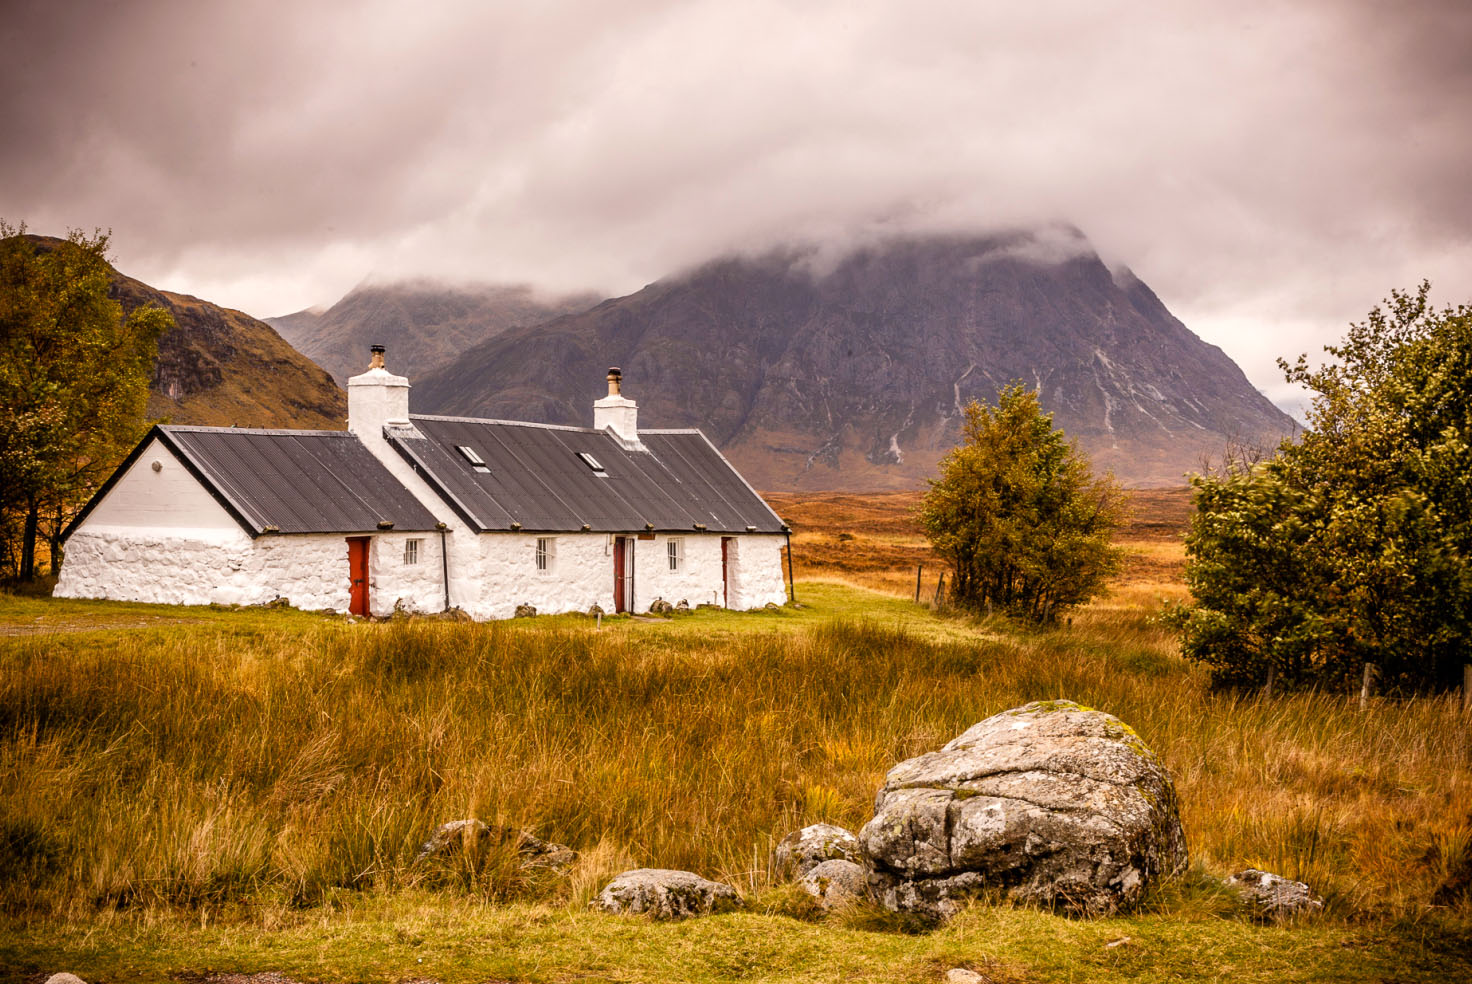
Ok, I know I keep going on about it, but really if there's one aspect of a scene that can make or break the image more than any other, it's the lighting. You might have the most incredible landscape or stunning portrait model, but without the right quality of light and knowing how to make best use of it, you can still be left with a flat, dull, and uninspiring photo, so it's often very important to find the right time of day to shoot your outdoor scene. This brings me neatly on to the The Golden Hour in photography (or sometimes 'Magic Hour'), it's roughly the first hour of light after sunrise, and the last hour of light before sunset. The exact times and durations vary depending on the time of year, and where in the world you are. The further you are from the equator, the longer your golden hour. During the golden hour, the sun is low in the sky, producing a soft, warm light which for most subjects is more flattering than the harsh midday sun that we're sometimes unable to avoid. The light at these times is also less contrasty, which reducing the chances of losing parts of your subject in strong shadows or blown-out highlights. The warm glow adds a pleasing feel to the scene, and the long shadows help to pick out details, adding texture and depth to the image. And if that wasn't enough, there's an added bonus, there are generally fewer people around at dawn and dusk than there are at other times of the day, giving you a chance to capture your images in peace and quiet. To shoot the sun as [...]

The Golden Hour in Photography2017-05-29T16:22:15+01:00

Where to focus when taking a landscape photo – Landscape photography tips

2017-05-29T16:22:15+01:00

Where should you focus when taking a Landscape photo? - landscape photography tips Typically, but not always, you will want to keep as much of the image in focus as possible and this means selecting a small aperture (large number) to ensure that you end up with a wide depth of field. This will help to ensure that close and far away parts of the image are in focus. But at what part of the scene should you actually focus on? My guess is that when taking a landscape photo, many people would set the focus point to around the middle of the scene, or even at the horizon, but that’s not the best place to focus. As a general rule you should focus in the lower half of the frame, about a third of the way in to the scene. But this is only a general rule and you might want to ignore it if the scene has a particular point of interest in it that isn't around the third area. However if your landscape shot doesn’t have one specific point of interest it's probably a rule worth using.

Where to focus when taking a landscape photo – Landscape photography tips2017-05-29T16:22:15+01:00

The positive impact of ‘Negative Space’

2017-05-29T16:22:15+01:00

What is Negative Space' Negative space is a concept that's been used in art, design, architecture, and sculpture for many years and can bring a new creative edge to many photos, sometimes turning an average photo into an outstanding one. Negative space is simply the area surrounding the main subject in a photo, it can give your photos an entirely different feel, and create an atmosphere that a photo of the same subject filling the frame will lack. The absence of content does not mean the absence of interest, in fact negative space often adds interest as it can draw the viewers eye and place a stronger emphasis on the subject, be it a person a flower or an interesting graphic. I love to use negative space, and the opportunities are endless, the following are some of my images that I hope will inspire you for your own photography. Negative space also provides a little 'breathing room', giving your eyes somewhere to rest and preventing your image from appearing too cluttered with unnecessary detail, all of this adds up to a more engaging composition. How to use Negative Space Mastering the use of negative space can take a little time and practise, probably because we're so used to focusing on the main subject in a scene that it can seem strange to treat it almost as an afterthought. However, doing so will make you consider each element in your scene more carefully, leading to much stronger compositions Be generous with the amount of empty space you leave, and don't feel you have to cram something interesting into every square inch [...]

The positive impact of ‘Negative Space’2017-05-29T16:22:15+01:00

Window light portraits, Part I – Shooting parallel to window

2017-10-10T15:43:56+01:00

Natural light photography - Window Light portrait tips For many portraits, nothing beats the natural beauty of window light. The larger the light source in relation to the subject, the softer the light, so directional window light can can create beautifully lit, soft portraits that bring out great looking skin tones and display a seemingly perfect balance between shadows and highlights. There are several ways to use window light for portraits, providing varying lighting pattern for different 'looks', in this tip I'm going to be covering shooting parallel to the window. This type of light provides directional light for a slightly more dramatic look. About the window Avoid sunshine streaming in through the window, as it will ruin the portrait. Choose a north facing window (or south if you live in the southern hemisphere!), or a cloudy day. If it's a large window, sometimes there can be too much light, that might be fine, but you'd have to experiment. You can also draw the curtains or close blinds to get a more dramatic portrait. Subject positioning The closer your subject is to the window, the stronger the contrast between light and shadow on their face, generally speaking about 4 feet (just over a metre) is fine. As your subject moves further into the room, the light will be flatter and less dramatic. The angle of the light should be from above, so if the window isn't very high, or you have a tall subject, sit them down. Your subject should either look slightly off-camera towards the window, or look at the camera but with their face turned slightly towards the window (this will provide [...]

Window light portraits, Part I – Shooting parallel to window2017-10-10T15:43:56+01:00

Miscellaneous individual and group posing tips – Part I

2017-05-29T16:22:15+01:00

Expression over Perfection You can set up the best poses with fantastic lighting in a gorgeous location, but the photos can be ruined by poor facial expressions. Expressions are everything, without a great expression, nothing works. Try telling a 4 year old child to smile, you'd be wasting your time, unless you particularly wanted a false, cheesy smile!! In order to get great, natural expressions, you need to build a relationship with your subjects, talk to them beforehand and throughout the session, praise them when it's good and ignore the bad. Develop a rapport with them and be genuinely interested in what they have to say. It’s important that you relax, keep the conversation light, be yourself, and allow the connection to develop naturally. With children it's all about play, running, jumping, anything goes, and then you're much more likely to get great expressions, like in the above photo. Seated poses can sometimes be easier The more you show of your subjects, the harder it is to pose them naturally, so sometimes it's easier to sit them down. In the above photo, the couple are turned sideways, that's always a good start, the husband has his back to the tree with his legs apart and the wife is sitting between his legs. I asked her not to sit down flat on her bum, but instead to roll onto her hip, that avoids her lower area 'squishing out' (that's a photography technical term!!). Also notice the way her arm is draped over her loving husband's knee, which shows the contact and relationship between them. Use different angles We see the world from [...]

Miscellaneous individual and group posing tips – Part I2017-05-29T16:22:15+01:00

Learn how the Shutter Speed affects your flash photos – flash photography tips

2017-05-29T16:22:15+01:00

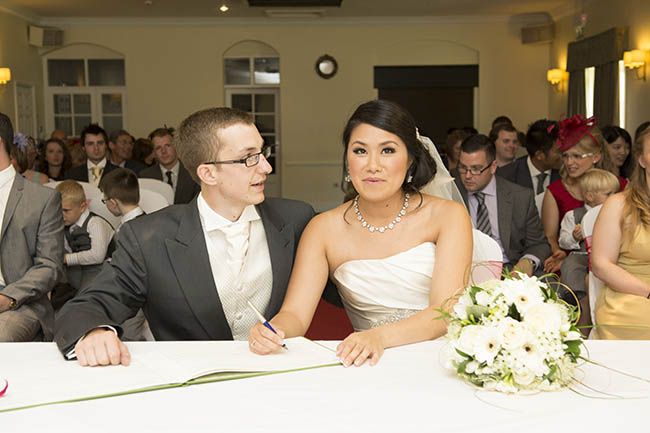
Flash photography tips - has this ever happened to you? You take a portrait using your built-in or external flash, but the photo is too bright or too dark, like the slightly over-exposed couple and wedding register on the table in the above shot. What did you do to fix it?:- Use exposure compensation Change from aperture to shutter priority or vice versa Change the flash exposure compensation (FEC) Change the ISO Well, there is no one quick answer, it all depends on what part of the image was over or under-exposed and your creative intention when taking the photo. But it helps to know that when using flash, changing the shutter speed has absolutely no effect on the light from the flash. That's because the flash burst of light is almost instantaneous, much faster than any of your typical shutter speeds when using flash. Changing the shutter speed only affects the ambient light. Here's a quick lighting setup outside my house during a sunny day. I put a speedlight on a stand and took a series of shots of the wall (extremely interesting subject!!). I used the camera's Manual mode and I only adjusted the shutter speed between shots. You can see that the light on the wall from the flash is exactly the same in every shot, but the ambient light is getting lighter as I slow the shutter speed.   ...until eventually, the light from the flash on the wall is perfectly balanced with the ambient light. So how does this help? In the wedding photo at the top of the page, I used Manual mode and made a guess of the exposure, it was only a test shot, but [...]

Learn how the Shutter Speed affects your flash photos – flash photography tips2017-05-29T16:22:15+01:00
  • what is iso

What is ISO – Understand ISO and get out of the Auto mode

2017-05-29T16:22:15+01:00

ISO is one of the most important camera settings, you will significantly improve not just the quality of your photos, but also the variety of them too by making good use of the ISO setting. Years ago, in the days of film, now being lost in the midst of time, the film manufacturers used to print a number on the side of the box. This number represented the speed of the film, that is, how sensitive the film was to light, and the higher the number, the more sensitive was the film to light. Using a higher ASA film made it much easier to take photos in low light or to take fast moving subjects, i.e sports or birds in flight. The problem was, especially in the early days of film, the higher the ISO, the more 'grain' was introduced to the negative and consequently the prints. In this digital age, the term ASA has been replaced with ISO, and 'grain' is now referred to as 'noise'. With film, yo were locked into the ASA for the whole roll of film, the only way of varying the ASA while shooting was to carry another camera body loaded with a different film. How times have changed, we are now able to vary the ISO on a frame by frame basis, plus in my opinion the quality of high ISO images is now better than it was with film. [do action="tl-linktocurriculum1"] [/do] Here's a simple analogy showing how the sensitivity of the camera sensor changes when you adjust the ISO. If you arrive at a cinema show a bit late, everything looks really dark when you go in doesn't [...]

What is ISO – Understand ISO and get out of the Auto mode2017-05-29T16:22:15+01:00

Focusing tips – Get out of the Auto Area mode

2017-05-29T16:22:15+01:00

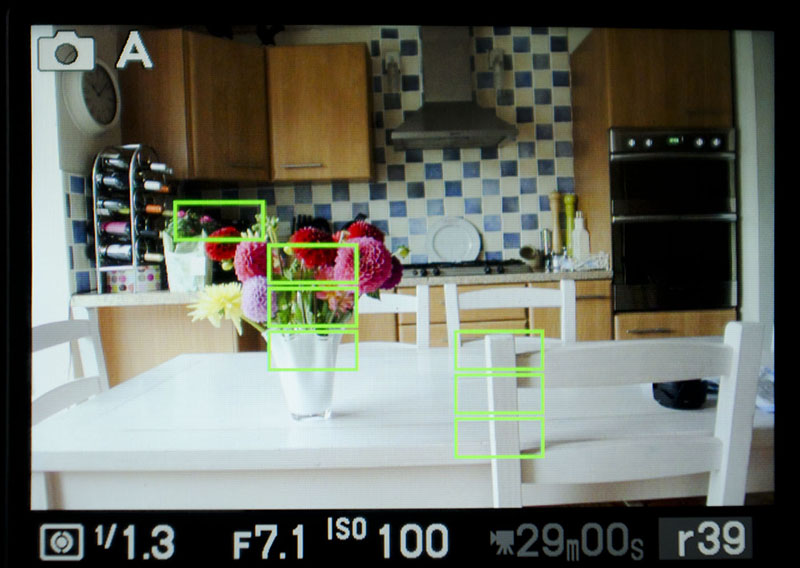
The focus areas on your camera are the ones that light up in the viewfinder or LCD screen when you half press the shutter. But do several squares light up as in the the above shot of my kitchen, or just the one? If the former, this tip is for you! One of the biggest steps you can take in getting tack sharp photos is to start using single point auto focus to decide for yourself what should be in focus and to nail the shot. Looking at the above image, you can see that the focus squares are on the kitchen chair, the flowers on the table, and the flowers at the back. So which of those is going to be in sharp focus. Well who knows? Well actually it's usually the nearest object or the most prominent, but can you be sure? Using the auto area or grid grid focus system is a bit like throwing a handful of darts and hoping one of them hits the bullseye, even more so when shooting using a shallow depth of field. [do action="tl-linktocurriculum2"] [/do] When new photographers first start out, they tend to let the camera decide how to take the shot, but they soon discover that letting some anonymous engineer in Japan make decisions is probably not the best way to go (ok, the engineer may not come from Japan, but you get my meaning!). Quite often, the default setting on new cameras is Auto Area / Grid focusing and the camera uses multiple points to decide where to focus. To be honest, more often than not, the camera focuses on the correct subject, because the subject is nearest to [...]

Focusing tips – Get out of the Auto Area mode2017-05-29T16:22:15+01:00

Focusing tips – How to focus and re-compose

2017-05-29T16:22:15+01:00

Rather than allow your camera to choose it's own focus area using focus 'auto-area / grid area', you'll get far more consistent results if you just use one focus area that you have control over. But depending on your camera, you may not be able to get out of the auto area / grid area mode unless you first get out of the 'full auto-mode' and switch to Aperture Priority, Shutter Speed priority or the 'P' mode. Once you've done that you should have a focus area in the dead centre of your viewfinder or LCD screen, it normally lights up when you half press the shutter. But, just like in the above photo, what if your main subject is not in the centre, or you want to use the rule of thirds for a better composition? 'Focus and re-compose' to the rescue All you need do is place the focus square on your main subject, and half-press the shutter. That will lock the focus and exposure. Then, keeping the shutter half-pressed, re-compose so that your subject is now in the correct position in the frame. [do action="tl-linktocurriculum2"] [/do] Many photographers use the 'focus and re-compose' technique all of the time, it's very simple to do and generally very accurate. But it can fail under some circumstances, if you're shooting at wide apertures and have a very shallow depth-of-field, when you re-compose the subject may no longer be on the same plane of focus, and so will not be tack sharp. In that case, just use one of the camera dials to move the focus area square over the subject, like in the photo at the top of the [...]

Focusing tips – How to focus and re-compose2017-05-29T16:22:15+01:00

Focusing tips – Make use of edge contrast

2017-05-29T16:22:15+01:00

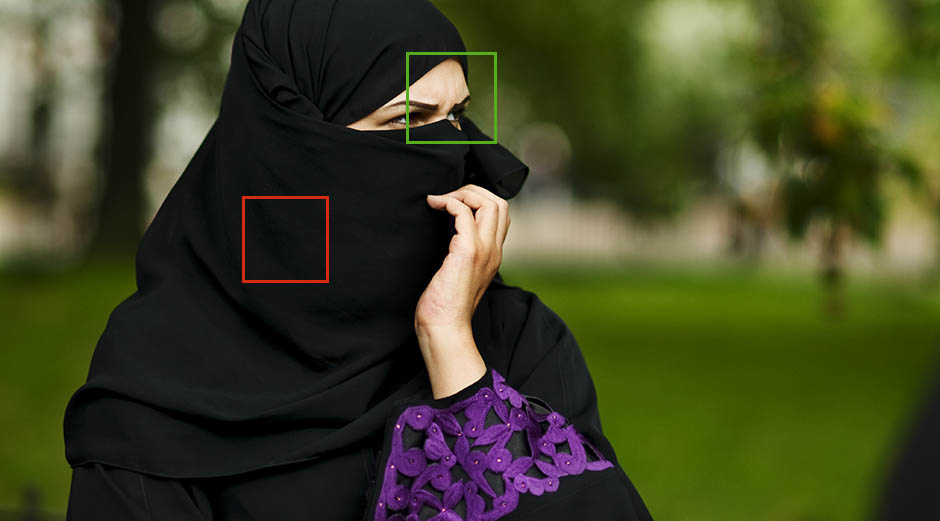
Auto focus systems on most DSLRs work by sensing the difference in contrast between edges, even those that use Phase Detection Autofocus. But when there are no sharp edges or contrast, or when there is not enough light to detect the contrast, the lens's auto focus will keep searching for an edge and will not be able to focus, this known as 'hunting'. For example, if you try to focus on a cloudless sky or on a solid coloured wall with no contrasting edges, the camera won't be able to acquire automatic focus because of lack of contrasting edges. These sequence of photos were taken at Speakers Corner, Hyde Park in London, where on Sunday mornings anybody can literally get up on their 'Soup Boxes' and scream their opinions to the world! In the shot above, had I tried to focus on the plain area of the Muslim ladies' bhurka, the lens would not have been able to lock focus, so I intentionally set the focus square partly on her face, bhurka nd background and got an instant focus lock. Similarly in this shot I focused on the man's face, had I tried to focus on his jacket, I would have had a problem. Again, on his face [do action="tl-linktonatlightdoc"] [/do]

Focusing tips – Make use of edge contrast2017-05-29T16:22:15+01:00
Go to Top